Crochet mini bag keychain tutorial for beginners
Creating a mini crochet bag keychain is a fun and simple project, especially for beginners! Here’s a step-by-step guide on how to make a cute mini bag keychain.

Materials You’ll Need:
-
Yarn: Choose a medium-weight yarn (worsted weight is a good choice) in the color of your choice. You can also use a thinner yarn for a smaller bag.
-
Crochet hook: A 3.5mm or 4mm crochet hook should work well with worsted weight yarn.
-
Keychain ring: These are easily available at craft stores or online.
-
Tapestry needle: For weaving in the ends.
-
Scissors: To cut your yarn.
Stitches You’ll Need to Know:
-
Chain (ch): The most basic stitch.
-
Slip stitch (sl st): Used to join rounds or move stitches.
-
Single crochet (sc): A basic stitch that creates a firm fabric.
Step-by-Step Instructions:
1. Making the Motifs:
You will need to create several small crochet motifs to build the base and sides of the mini bag. Let’s start by making a basic granny square motif.
Granny Square Motif:
-
Round 1: Start with a magic ring, or you can chain 4 and join to form a ring.
-
Chain 3 (counts as first dc), and then work 2 more dc into the ring (3 dc in total).
-
Ch 2, then work 3 dc into the ring. Repeat ch 2, 3 dc two more times. You should have 4 sets of 3 dc separated by chain spaces.
-
Join with a sl st to the top of the beginning chain-3.
-
-
Round 2: Join a new color (optional) and ch 3 (counts as the first dc).
-
Work 2 dc into the first ch-2 space, ch 2, 3 dc into the next ch-2 space—repeat this around.
-
Join with a sl st to the top of the beginning chain-3.
-
-
Round 3: Continue adding rounds by chaining 3 (counts as the first dc) and working 2 dc into the ch-2 space from the previous round.
-
In each ch-2 space, work 3 dc, then ch 2. Repeat all the way around, joining with a sl st to close the round.
-
You can stop at this point, or add more rounds depending on the size of the motif you need for your mini bag.
Make 4-6 Motifs depending on how large you want your bag to be.

2. Assembling the Bag:
Now that you have your motifs, it’s time to sew them together.
Attaching Motifs:
-
Lay the motifs out in a rectangle or square shape, depending on your design (e.g., 2 x 3 motifs for a rectangular bag).
-
Use a tapestry needle and the same yarn to whip stitch the edges of the motifs together. Work carefully so the seams are as neat as possible.
-
Once you’ve attached all the motifs, you should have a flat piece resembling the sides and bottom of the bag.

3. Forming the Sides of the Bag:
-
Fold the stitched-together motifs into a bag shape (usually a rectangle or square shape).
-
Sew up the sides: Use your tapestry needle to sew the two side edges of the rectangle together, leaving the top open.
-
You should now have a small bag shape, with the motifs creating the sides and base.
4. Making the Handle:
-
Chain 40-60 (depending on how long you want your strap to be).
-
Row 1: Turn and sc in each stitch across.
-
Row 2: Repeat by turning and sc back down the chain.
-
You can make the strap as thick as you want by adding more rows of sc.
-
Finish off and leave a long tail to sew the handle onto the bag.
5. Attaching the Handle and Keychain Ring:
-
Attach one end of the strap to one side of the top of your bag using a yarn needle.
-
Attach the other end of the strap to the opposite side of the bag.
-
Attach the keychain ring to the top corner or side of the bag by sewing it on with a few stitches or using a small jump ring.

6. Finishing Touches:
-
Weave in any loose ends using a tapestry needle.
-
Optional: Add a small embellishment like a charm or button for decoration.
Your Crochet Motif Mini Bag Keychain is Complete!
You now have a cute, personalized mini bag keychain, perfect for gifting or keeping for yourself. You can also experiment with different color combinations for the motifs to make the bag even more unique.
Let me know if you need any further help with the tutorial or have any questions!
video tutorial :






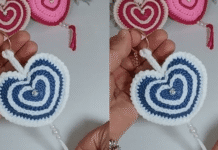


[…] Making: Begin by crocheting a small rectangular base using single crochet stitches. Form the sides by folding and stitching the edges together, leaving the top open. Attach a handle by chaining a desired length and securing it to the top edges. For added functionality, sew a button or snap closure at the top. Finally, affix the keychain ring to a corner of the bag. (Crochet mini bag keychain tutorial for beginners – Knitting Patterns DIY) […]
Comments are closed.